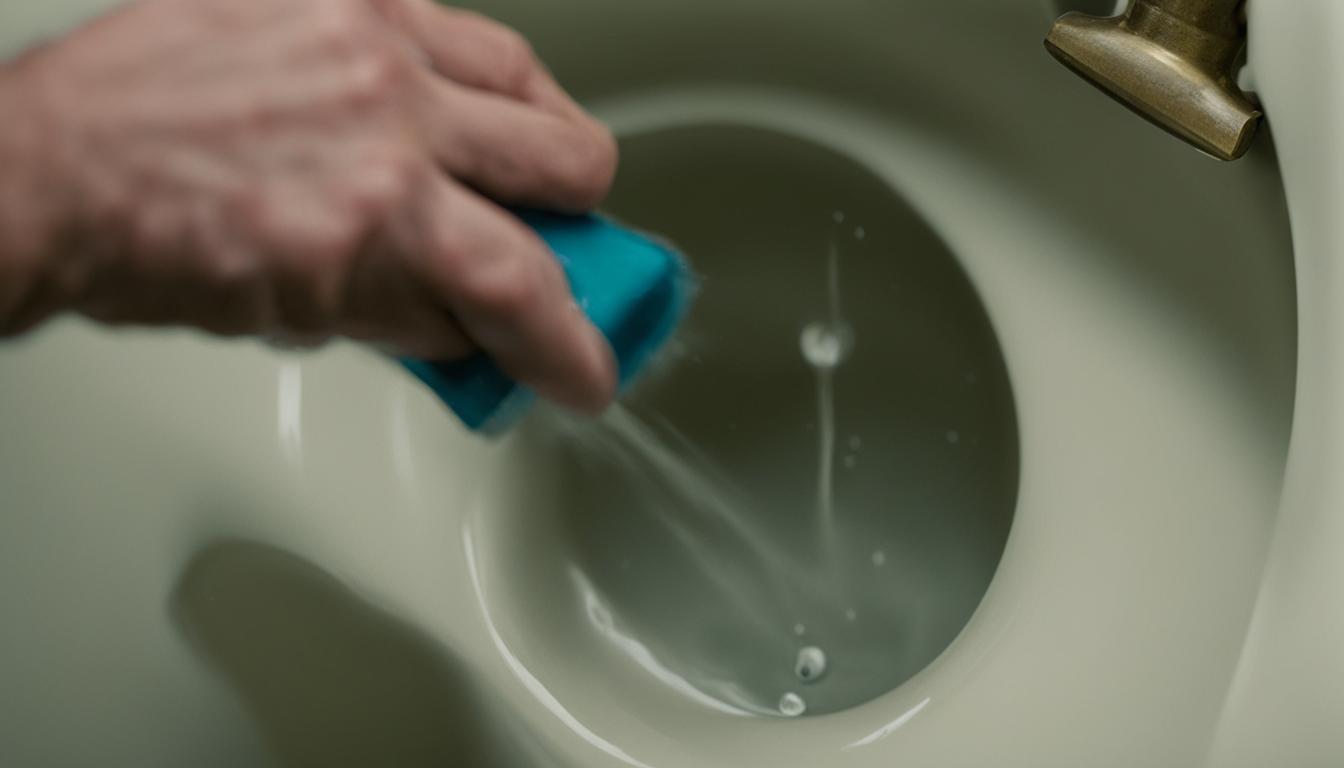
Quick Fix for a Clogged Toilet at Home Picture this: you’re at home and suddenly faced with a clogged toilet. The water starts to rise, and the familiar panic sets in. But before you let anxiety take hold, remember, you’ve got this. With a few tried-and-true DIY techniques, you can tackle that toilet clog and prevent an overflow—all while keeping your composure. In this guide, we’re diving deep into some handy tips and tricks that can help unclog your toilet, turning what seemed like a plumbing nightmare into a manageable task. Roll up your sleeves, because we’re about to sift through some simple yet effective methods that can bring relief to any homeowner. From the humble plunger to the nifty toilet snake, we’re going to explore all the tools and techniques available to ensure you’re prepared for any bathroom predicament. So, let’s not let a toilet overflow interrupt your day—check out these accessible DIY solutions that you can implement right now. Key Takeaways Understanding your DIY options for a clogged toilet can save the day. Immediate action can prevent further issues like toilet overflow. Familiarizing yourself with various tools can make unclogging a breeze. Some clogs can be resolved without professional assistance, using simple techniques. Maintaining calm backed with the right knowledge turns a crisis into a quick fix. Identifying the Severity of Your Toilet Clog It’s a typical scenario: You flush the toilet, and instead of the familiar whirlpool disappearing act, you’re met with a rising tide and a sinking feeling—your toilet is clogged. But not all clogs are created equal. Understanding the nuances of clogged toilet signs can mean the difference between a quick plunge and an emergency call to a professional plumber. Common Signs of a Clogged Toilet So, how do you know if you’re dealing with a typical blockage or a severe toilet clog? Here are the tell-tale signs: If your toilet won’t flush, this is the most straightforward indicator that a clog is present. A toilet draining slowly, well after you’ve flushed, suggests a partial blockage lurking in your pipes. Alerting you through audio, an unusual gurgling sound from nearby drains could imply your clog is not a lone ranger. Each sign carries its weight, warning you to take action. While a plunger is your first line of defense, be cautious not to overdo it if the clog shows resistance—aggressive plunging can sometimes worsen a blockage. When to Call a Professional There are times when a toilet backup signals more profound distress within your plumbing system—times when a professional’s expertise is necessary. Consider these scenarios: Water rising to the brim of the bowl without draining is a red-flag moment—this is no place for plungers, so it’s best to call a professional immediately. Noticeable water leakage onto the bathroom floor following a flush points to potential structural issues, possibly extending beyond the toilet itself. Encountering unusual materials or substances in the toilet bowl could be indicative of broken components or foreign objects that require professional attention. Unsure if your situation warrants a service call? Always err on the side of caution. Here’s a quick reference table to gauge when to tackle clogs yourself and when to dial up a certified plumber: Issue DIY Plunge Appropriate? Call a Plumber? Slight water rises after flushing Yes No Repeated clogging Attempt Once Yes, if persistent Water leaking onto the floor No Yes, immediately Unusual objects in the bowl No Yes, to prevent damage Maintaining regular plumbing maintenance and knowing what kind of services to seek are essential steps to avoid exacerbating a complex toilet blockage. Understand the signs, know your limits, and remember: a good plumber can save more than just your bathroom’s day. Common Causes of a Clogged Toilet Your toilet is an indispensable part of daily life, and understanding the causes of toilet blockage can help you prevent the dreaded clog and keep things flowing smoothly. Let’s dive into common culprits and how you can steer clear of a blocked toilet nightmare. First and foremost, the misconception surrounding flushable wipes needs to be addressed. Despite being marketed as safe for toilets, these wipes often do not disintegrate like regular toilet paper, leading to blockages in the plumbing system. Even wipes labeled as “flushable” can cause significant issues in your home’s pipes and the municipal sewer system. According to the Environmental Protection Agency, “Flushable wipes are a major concern for pipelines and should be disposed of in the trash.” Another frequent offender is the use of excessive toilet paper. While it’s necessary for personal hygiene, using too much toilet paper can easily clog toilets, especially those with lower flush power or older plumbing. Finally, the design of your toilet itself might contribute to blockages. Low-flow toilets are great for saving water, but some models may lack the necessary pressure to push material through the pipes, making them more susceptible to clogs. Here’s a breakdown of these common causes and how you might deal with them. Cause of Blockage Description Preventative Measures Flushable Wipes Wipes that do not break down easily in water Dispose of wipes in the trash; use only toilet paper Excessive Toilet Paper Using too much toilet paper during a single flush Use a moderate amount and flush more than once if needed Low-Flow Toilets Modern toilets are designed to use less water Regular maintenance and consider a pressure-assist retrofit Old Piping Pipes with sediment buildup or corrosion Inspect pipes regularly and clear blockages immediately Being mindful of what goes down your toilet and how it’s flushed will go a long way in keeping blockages at bay. Maintain a clear, functioning toilet and avoid the headache of unclogging by remembering these tips. Step-By-Step Guide to Unclog Toilet When faced with a clogged toilet, the right tools and techniques are your best allies. Equipping yourself adequately and mastering the correct methodology can transform this daunting task into a manageable DIY fix. Let’s start by ensuring you’ve got everything you need. Get Your Tools Ready At the
Read More
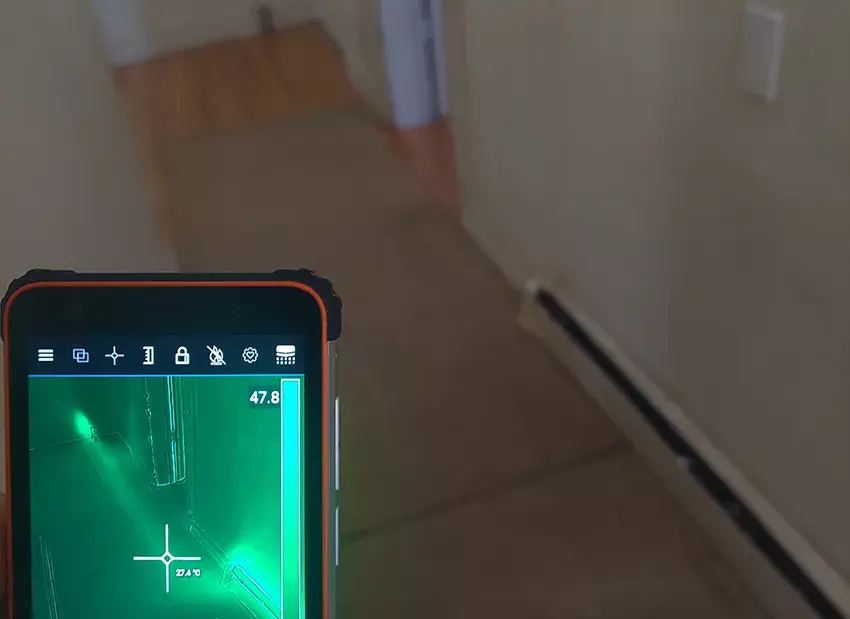
Leak Detection: Importance & Signs to Watch For Have you ever heard the sound of dripping water and wondered where it’s coming from? Or have you noticed a strange musty smell around your home, but can’t locate the source? These could be signs of water leaks. Water leaks can cause extensive damage to your home if left untreated. Not only can they ruin furniture and appliances, but they can also promote mold and mildew growth, which can lead to health problems. In this section, we will explore the importance of leak detection and highlight the crucial signs to watch out for to prevent costly damage to your home. Key Takeaways Water leaks can cause significant damage to your home and health. Timely leak detection is crucial to preventing costly repairs. Watch out for signs such as the sound of dripping water or musty smells. Ignoring water leaks can lead to mold and mildew growth. Promptly repairing water leaks can save you money and prevent further damage. Importance of Early Leak Detection Water leaks can cause significant damage to your home and lead to costly repairs if left unaddressed. That’s why it’s essential to prioritize water leak prevention and act promptly when leaks are detected. Early leak detection plays a vital role in preventing water damage, as even small leaks can cause extensive damage over time. Neglecting leaks can result in serious consequences, including: “Water damage to your home’s structure, furnishing, and personal items.” -National Flood Insurance Program Ignoring water leaks can also result in health risks from mold and mildew growth. Additionally, water leaks can increase your water bill and waste precious resources. That’s why it’s crucial to regularly check for signs of water leaks and take immediate action by calling for professional leak detection services if you suspect a problem. Effective Ways to Prevent Water Leaks Here are some simple measures you can take to prevent water leaks: Check your appliances, fixtures, and pipes for signs of damage or wear and tear regularly. Have a plumber inspect your pipes at least once a year, especially if you live in an older home. Install a leak detection system that will alert you to any leaks as soon as they occur. Ensure your home’s foundation is properly sealed and maintained. By taking these steps, you can reduce the risk of water leaks and avoid costly repairs in the future. Common Signs of Water Leaks Water leaks can cause severe damage to your home if left unattended. Knowing the signs of water leaks can help you identify the problem early and avoid potentially costly repairs. Here are some common signs to watch out for: Musty odors Visible water stains on walls and ceilings Peeling or bubbling paint or wallpaper Warping or buckling of floors, baseboards, or walls Dripping or hissing sounds from pipes An increase in your water bill without an explanation If you notice any of these signs in your home, it’s essential to take action immediately to prevent further damage. Ignoring water leaks can result in significant water damage and costly repairs. Note: Some water leaks may be hidden and difficult to detect. If you suspect a problem with your plumbing, it’s recommended to seek professional leak detection services to identify and locate hidden leaks. Methods for Water Leak Detection Water leaks can occur at any time, and detecting them early can save you from costly damages. Fortunately, various water leak detection methods exist. A simple way to check for water leaks is to turn off all taps and take a water meter reading. Check again after a few hours or overnight; if the meter reading has changed, you might leak. Another method is to check your water bill. If it has spiked in recent months, it could indicate a hidden water leak. You can also inspect your property for water damage or musty smells, which indicate water leaks. Damaged walls or floors, mold growth, or peeling paint can all be signs of water leaks. However, if you suspect a leak but cannot locate it, professional leak detection services may be necessary. These services use state-of-the-art equipment, such as infrared cameras and ultrasonic devices, to locate even hidden leaks. Why Fixing Water Leaks is Essential Ignoring water leaks can lead to significant water damage in your home, which can negatively impact your health and that of your loved ones. It’s essential to promptly fix any leaks to prevent expensive repairs and potential health risks. “One of the most common issues that homeowners face is water damage caused by leaky pipes. Water damage can lead to structural issues and mold growth, which can be a health hazard for you and your family.” According to HomeAdvisor, failing to address a water leak can cost an average of $2,386 in repairs. This amount can increase if the leak leads to flooding and structural damage. Taking quick action to fix water leaks can save you from unnecessary expenses and further damage to your property. Leaks can also lead to mold growth, which can cause respiratory problems and allergic reactions. Inhaling mold spores can be particularly dangerous for people with asthma, allergies, or weakened immune systems. Actively addressing water leaks is a crucial step in maintaining a safe and healthy living environment in your home. What can you do? If you notice any signs of water leaks, such as brown stains on ceilings and walls, musty odors, or an increase in your water bill, it’s important to take immediate action. You can start by identifying the source of the leak and fixing it yourself if it’s a minor issue. However, for more complex leaks, it’s recommended to seek the services of a professional leak detection and repair company. Remember, fixing water leaks promptly can save you from significant expenses and potential health problems. Don’t hesitate to take action if you notice any signs of a water leak in your home. Steps for Water Leak Repair If you have discovered a water leak in your
Read More
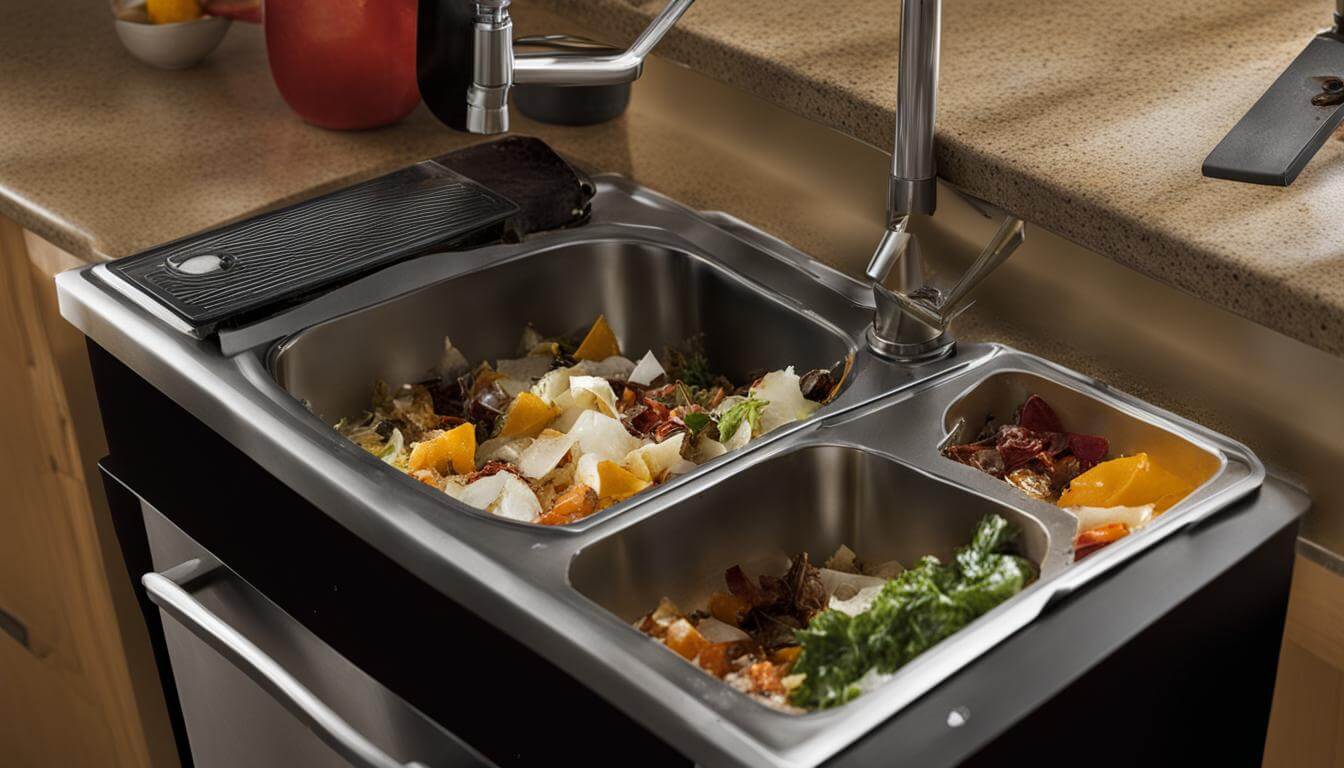
Troubleshooting: Why Is My Garbage Disposal Not Working? If you’re experiencing issues with your garbage disposal, you’re not alone. Garbage disposals not working is a common problem that can be caused by a range of issues, from electrical problems to jammed units. Fortunately, with some troubleshooting, you can diagnose and fix many of these issues on your own. Key Takeaways: Garbage disposals can experience various issues that prevent them from working properly. Troubleshooting can help diagnose and solve many common problems. Some issues may require professional repair or replacement. Following safety protocols is essential when troubleshooting and repairing a garbage disposal. Maintaining your garbage disposal properly can help prevent future issues. Troubleshooting: Why Is My Garbage Disposal Not Working? garbage disposal not turning on: If your garbage disposal is not turning on, it can be frustrating. Fear not, this common issue can usually be resolved through troubleshooting and fixing the problem yourself. Here are some steps to troubleshooting garbage disposal follow: Check for Power: Ensure that your garbage disposal is plugged in and that the circuit breaker is not tripped. If the unit is not receiving power, it will not turn on. Reset the Unit: Some garbage disposals have a reset button located on the bottom of the unit. Press and hold this button for a few seconds to reset the disposal, and then try turning it on again. Remove Jammed Objects: A jammed garbage disposal can also cause it to not turn on. Before attempting to clear any clogs, always ensure that the unit is unplugged or turned off at the circuit breaker. Use a flashlight and look inside the disposal for any large, hard objects that may be causing the jam. Clear the Jam: If the object is visible, use tongs or pliers to remove it from the unit. For smaller clogs, use a specialized wrench that fits into the bottom of the unit to manually turn the blades and clear the jam. Call a Professional: If the above steps do not work, it may be time to call a professional for repair or replacement. Attempting to fix an electrical issue without the proper knowledge and tools can be dangerous. You can avoid future garbage disposal problems by practicing good maintenance habits. Always run water before and after using the disposal, avoid putting hard or fibrous material down the drain, and clean the unit regularly with a mixture of ice cubes and vinegar. Troubleshooting Garbage Disposal Problems Garbage disposals are highly convenient appliances, but they can also be prone to certain problems. Here are some common garbage disposal problems you may encounter: Strange noises coming from the unit Leaks under the sink Unpleasant odors emanating from the disposal Fortunately, these problems can usually be resolved with some troubleshooting. Here are some tips to get you started: Strange noises: If your garbage disposal is making odd noises, it could be due to a jammed unit or a loose blade. To fix this, turn off the disposal and use pliers or tongs to remove any obstructions. Leaks: Leaks can occur due to a faulty gasket or loose connections. Check the gasket and connections for any damage or looseness and tighten as necessary. Odors: Odors can be a sign of built-up food particles or bacteria. Run some ice cubes and citrus peels through the disposal to eliminate odors and prevent future build-up. If these troubleshooting tips don’t solve the problem, it may be time to call in a professional. They can assist with more complex issues such as electrical problems or internal motor damage. Fixing Your Garbage Disposal After identifying the problem with your garbage disposal, it’s time to fixing garbage disposal. Follow these step-by-step instructions to repair common issues and ensure a successful repair. Resetting Your Garbage Disposal If your garbage disposal is not working at all, it may just need to be reset. Ensure the switch is in the “off” position. Locate the red reset button on the bottom of the garbage disposal. Press the button firmly. Turn the switch on to test if the garbage disposal is working. Clearing a Jammed Garbage Disposal If your garbage disposal makes a humming noise but does not turn on, it may be due to a jam. Turn off the unit and unplug it from the power source. Use a flashlight and tongs to carefully remove any objects or debris causing the jam. Plug the unit back in and turn it on to test if the garbage disposal is working properly. Replacing a Faulty Part If your garbage disposal is still not working after troubleshooting, it may be due to a faulty part that needs to be replaced. Garbage Disposal Part Replacement Instructions Garbage Disposal Blades Clean or replace blades according to the manufacturer’s instructions or replace the entire unit. Garbage Disposal Motor Replace the motor according to the manufacturer’s instructions or replace the entire unit. Garbage Disposal Switch Replace the switch according to the manufacturer’s instructions. Be sure to consult your garbage disposal’s user manual for specific replacement instructions and safety precautions. With the right tools and know-how, fixing your garbage disposal can save you time and money. Remember to always prioritize safety and contact a professional if you are unsure or uncomfortable with any repair tasks. Conclusion In conclusion, troubleshooting your garbage disposal is an essential part of maintaining it. By following the tips and steps outlined in this article, you should now be able to diagnose and fix the most common issues. Remember to always prioritize safety and shut off the power source before attempting any repairs. If you have any doubts or are uncomfortable handling repairs, consider contacting a professional. Taking care of your garbage disposal will ensure its longevity and save you money on costly repairs in the long run. Happy troubleshooting! FAQ Q: Why is my garbage disposal not working? A: There could be several reasons why your garbage disposal is not working, such as a tripped breaker, a clogged drain, or a malfunctioning motor. To
Read More