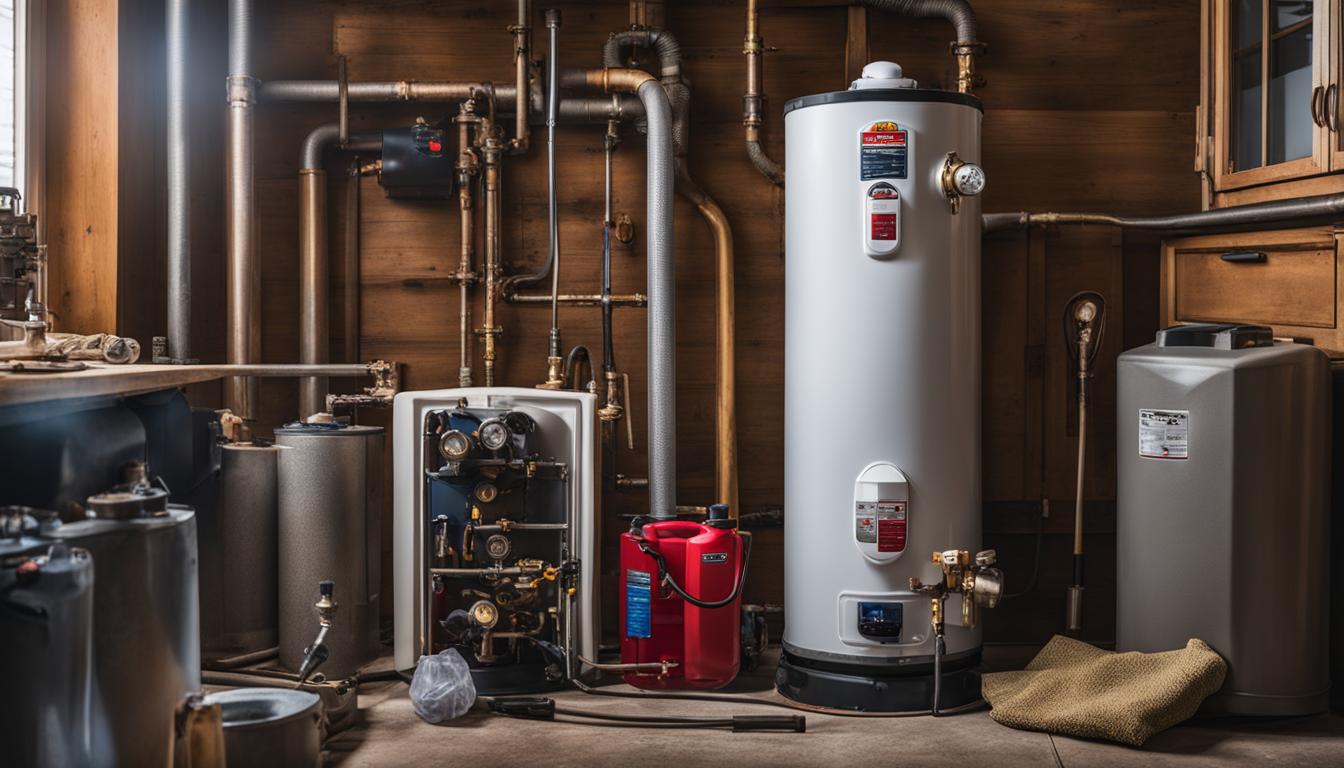
Water Heater Safety: Preventing Your Heater from Becoming a Bomb Are you aware of the potential risks associated with your water heater? A water heater explosion can lead to severe injuries and damage to your home. It’s crucial to prioritize water heater safety to protect yourself and your loved ones. In this section, we’ll explore preventative measures to avoid accidents and reduce the risk of explosions. It’s easy to overlook regular maintenance for your water heater, but neglecting it can lead to disastrous consequences. By following essential safety precautions and recognizing warning signs, you can prevent your water heater from becoming a potential hazard. Let’s dive in and learn essential tips to keep your water heater safe. Key Takeaways: Regular maintenance is crucial for preventing water heater accidents. Understanding the risks and warning signs can help you avoid potential hazards. Implementing preventative measures can reduce the risk of water heater explosions. Prioritizing water heater safety can protect yourself and your loved ones from potential disasters. Understanding the Risks Hot water is essential for everyday tasks and routines, but it’s important to remember that the water heater responsible for providing this comfort can also be a potential hazard. Water heater explosions can occur when there is a buildup of pressure caused by overheating or a malfunction in the tank. This pressure buildup can cause the tank to rupture, resulting in dangerous consequences that could harm your property and loved ones. To prevent water heater explosions, it’s essential to understand the risk factors involved. Here are a few key factors: Age: Older water heaters are more prone to malfunctions and failures, thereby increasing the risk of an explosion. It’s important to regularly inspect and maintain older water heaters to reduce the risk. Temperature: Water heaters that are set too high can overheat and become a ticking time bomb. The recommended temperature setting is 120 degrees Fahrenheit or lower. Maintenance: Lack of maintenance can lead to a buildup of sediment and pressure, leading to an explosion. Regular inspection and maintenance can prevent such occurrences. By understanding the risks associated with water heaters, you can take the necessary safety precautions to prevent explosions from occurring. These safety precautions involve proper maintenance, temperature control, and regular inspections. In the next section, we’ll explore these safety precautions in greater detail. Essential Maintenance for Safety Maintaining your water heater is key to preventing safety hazards. By taking care of your water heater, you can keep it functioning at its best and prevent issues that could lead to dangerous situations. Regular Water Heater Maintenance Checklist: Follow these essential water heater maintenance practices to keep your water heater running safely and efficiently: Check the temperature and pressure relief valve: This valve is vital to prevent your water heater from overheating and possibly exploding. Check it at least once a year to make sure it’s functioning correctly. Inspect the anode rod: The anode rod helps prevent rust and corrosion in your water heater by attracting corrosive elements. Check it once a year and replace it if necessary. Drain the tank: Sediment buildup at the bottom of the tank can lead to issues such as rust and poor heating efficiency. Drain the tank once a year to remove any sediment. Check for leaks: Leaks can cause water damage and lead to other issues. Check for leaks regularly and fix them immediately. Following this checklist is a great starting point, but you may also need to perform additional maintenance tasks depending on the type of water heater you have. Consult your owner’s manual and follow the manufacturer’s recommendations for optimal performance and safety. “Regular water heater maintenance not only keeps your water heater safe, but it can also prolong its lifespan and save you money on costly repairs.” By keeping up with regular maintenance, you’ll be taking a proactive approach to keep your water heater functioning safely and efficiently. Don’t wait until an issue arises – make water heater maintenance a priority to ensure a safe and reliable system. Signs of Trouble Preventing water heater explosions starts with recognizing common signs of trouble. By spotting issues early, you can take action to prevent a potentially dangerous situation. Unusual Sounds If you hear strange noises, such as banging, whistling, or popping coming from your water heater, sediment buildup is likely causing bubbles to form. This buildup can create hotspots which can lead to an explosion. Contact a plumber to remove the sediment and prevent further issues. Foul Odors If there is a rotten egg smell coming from your water heater, it could indicate a gas leak. Turn off the gas and contact a technician to fix the problem as soon as possible. Leaks Leaks around your water heater tank or valves can be a sign of a failing system. Ignoring these leaks can cause corrosion and eventually lead to a catastrophic failure. If you notice any leaks, call a professional for a repair or replacement. Temperature Fluctuations If the temperature of your water seems to fluctuate quickly and frequently, it could be a sign of a malfunctioning thermostat. This can cause the water inside the tank to boil, which can lead to an explosion. A plumber can check and replace the thermostat if necessary. Don’t ignore these warning signs. Prioritizing water heater safety and taking preventative measures can save you from a dangerous and potentially deadly situation. Preventative Measures Now that you understand the risks associated with water heaters and the importance of maintenance, let’s dive into actionable steps you can take to prevent potential hazards. Water Heater Safety Tips The first step towards preventing a water heater explosion is following essential safety tips, including: Keep flammable materials away from the water heater Adjust the temperature to no higher than 120°F to prevent overheating Regularly test the pressure relief valve to ensure it’s functioning properly Keep the area around the water heater clean and clutter-free “By following these tips, you can significantly reduce the risk of a water heater explosion and keep
Read More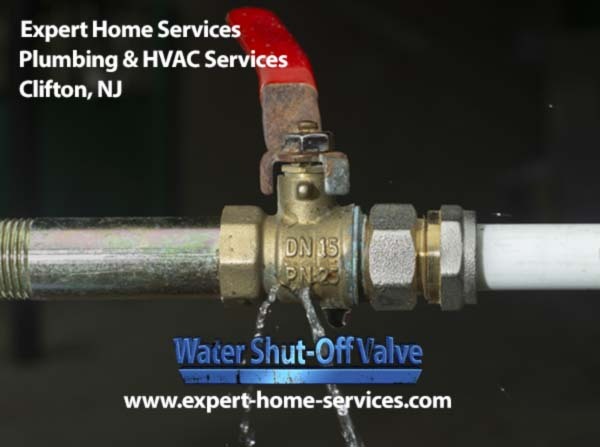
Locating Your Shut-Off Valve: A Handy Guide for Homeowners As a homeowner, it’s essential to Locating Your Shut-Off Valve. In case of a plumbing emergency, quick access to the shut-off valve can prevent significant damage to your property and provide you with peace of mind. However, many homeowners are unaware of where their Home shut-off valve is located. In this handy guide, we will explain why finding your shut-off valve is essential and provide practical tips for how to locate it. Key Takeaways: Knowing the location of your shut-off valve can prevent significant damage to your property. Common types of shut-off valves include gate valves, ball valves, and compression valves. The shut-off valve can be located near the water meter, inside your house, or outside near the main water line. It’s important to be familiar with different types of shut-off valves to operate them correctly. By locating your shut-off valve, you can have peace of mind and be prepared for any plumbing emergencies. Why Finding Your Shut-Off Valve Is Essential Knowing where your Shut-off valve is located in your home is crucial for preventing extensive water damage during a plumbing emergency. Whether it’s a burst pipe or a leaky faucet, shutting off the water supply quickly can save you thousands of dollars in repairs. By identifying the location of your home shut-off valve, you can be prepared for any unforeseen emergencies. Shut-off valve location: Plumbing emergencies can happen at any time, without warning, and can lead to devastating consequences if not dealt with straight away. By finding your Shut-off valve for plumbing emergencies, you can turn off the water supply in seconds, reducing the amount of water that may have leaked and minimizing the damage. Common plumbing emergencies such as burst pipes and overflowing toilets can be resolved by simply shutting off the water supply. It’s not only essential to locate your shut-off valve but also to maintain your shut-off valve. At least once a year, homeowners should test their shut-off valve to ensure that it is functioning correctly. A malfunctioning valve can lead to further water damage by failing to turn off the water supply when needed. Shut-off Valve Safety Tips It’s essential to follow these home water shut-off valve safety tips procedures when handling the shut-off valve during an emergency. Know the location of your shut-off valve: Familiarize yourself with the location of your shut-off valve before an emergency occurs. Turn off the electricity: If there is standing water in your home, turn off the electricity to prevent electrocution. Wear gloves: Handle the valve with gloves as it may be slippery during a plumbing emergency. By understanding the importance of locating and maintaining your shut-off valve and following the proper safety tips, you can be prepared to handle any plumbing emergencies that come your way. How to Find Your Shut-Off Valve Locating your shut-off valve is a crucial step in preventing water damage during an emergency plumbing situation. Here are some practical steps to help you find your shut-off valve: Check near the water meter: Start by checking the area near your water meter. Many shut-off valves are located close to the meter. Look for a rectangular plate on the wall marked “Water.” The valve should be on the same side as the meter, facing the street. Inspect the crawl space or basement: If you can’t find the shut-off valve near your water meter, check your crawl space or basement. Look for the main water supply line and follow it until you find the valve. It may be near the water heater or even under a sink. Search outside: If your shut-off valve is not inside your house, it could be located outside. Check near the pipeline that connects to your home’s main water supply. Look for a box or a covered hole. The valve may also be near your front yard or sidewalk. It’s important to note that the location of your shut-off valve may vary depending on your home’s plumbing system. If you’re having trouble finding it, refer to your home’s blueprint or contact a professional plumber for assistance. Additional Tips: Make sure you can easily access your shut-off valve in an emergency by clearing any debris or items blocking the way. If you have difficulty turning the valve, use a wrench or pliers to help you. Consider labeling the shut-off valve for future reference, especially if you have multiple valves in your home. Identifying Different Types of Shut-Off Valves There are three common types of shut-off valves found in homes: gate valves, ball valves, and compression valves. Identifying which type you have will help you operate your shut-off valve correctly in an emergency. Gate Valves Gate valves are the oldest and most traditional type of shut-off valve. They have a round handle that turns perpendicular to the pipe to open or close the valve. Gate valves are durable and designed to last a long time, but they can become stuck over time, making them difficult to turn. They are typically found near the main water line where it enters the house. Ball Valves Ball valves are newer and more efficient than gate valves. They have a lever handle that turns 90 degrees to control the water supply. Ball valves are easy to operate and provide a tight seal, making them ideal for emergencies. They are typically found near fixtures, such as toilets and sinks. Compression Valves Compression valves are the most common type of shut-off valve in homes today. They have a handle that is turned clockwise to shut off the water and counter-clockwise to open it. Compression valves are easy to identify by the presence of a hexagonal nut directly below the handle. They are typically found underneath sinks and toilets. Understanding the different types of shut-off valves will help you quickly locate and operate your shut-off valve in an emergency. Make sure you know which type you have in your home, and always test it periodically to ensure it is functioning
Read More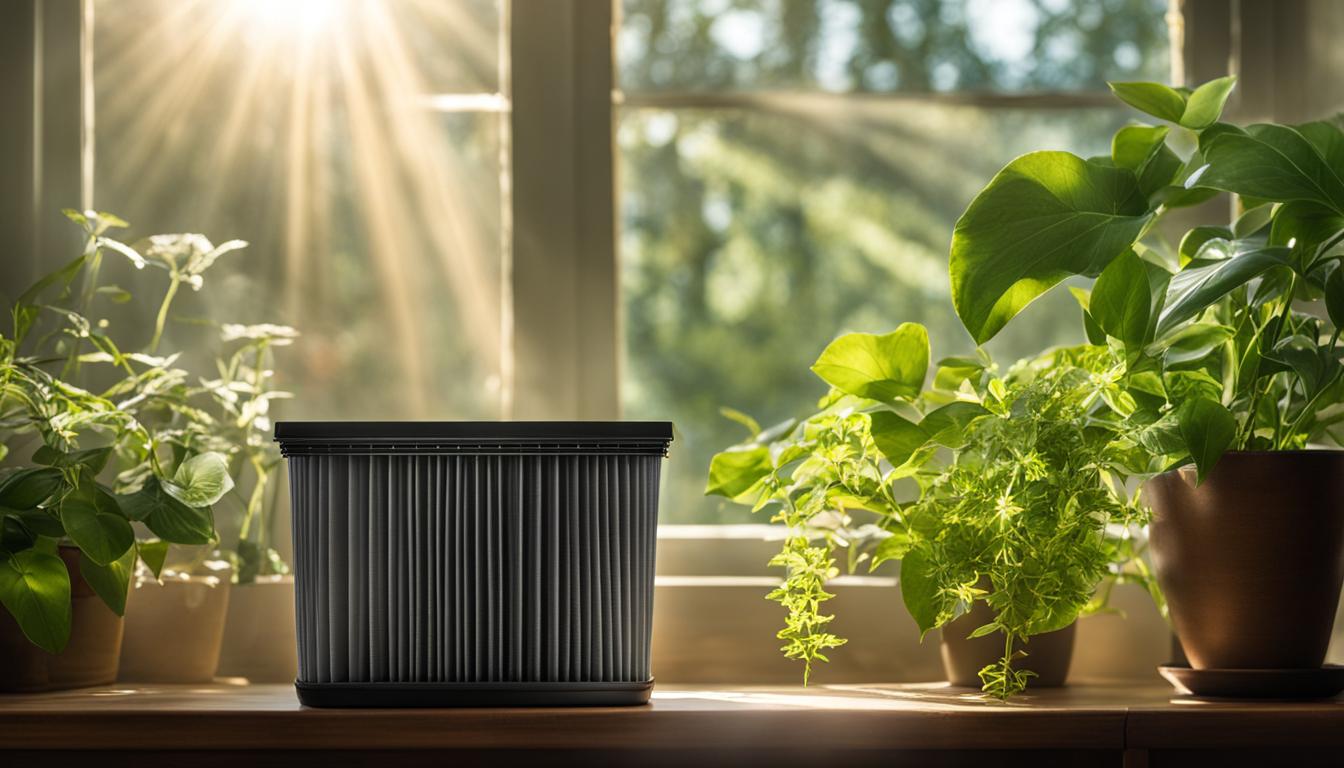
Air Filter Wisdom: Optimal Change Frequency Welcome to Air Filter Wisdom, where we explore the importance of air filter maintenance and the optimal frequency for changing your air filter. Keeping your indoor air clean and fresh is crucial for your health and wellbeing. Your air filter is an essential component of your heating, ventilation, and air conditioning (HVAC) system. It traps dust, pollen, bacteria, and other airborne particles that could impact your indoor air quality. But how often should you change it? In this section, we’ll answer this question and provide insights on how to ensure that your air filter is working optimally. Key Takeaways: Regular air filter maintenance is crucial for maintaining clean indoor air quality. The optimal frequency for changing your air filter depends on various factors such as the type of filter, usage patterns, and environmental conditions. Dirty air filters can negatively impact your HVAC system’s efficiency and increase energy consumption. Follow the recommended schedule for air filter replacements to maximize the lifespan of your filter and improve indoor air quality. Extend the life of your air filter by cleaning it regularly and selecting high-quality filters. Signs of a Dirty Air Filter Do you know the signs of a dirty air filter? If not, it’s important to learn them to ensure you’re maintaining good air quality in your home. Here are some of the signs that indicate your air filter needs changing: Excessive dust buildup around your vents Decreased airflow from your vents Increased energy bills Unpleasant odors in your home If you notice any of these signs, it’s time to change your air filter. Doing so will not only improve the air quality in your home, but it will also improve the efficiency of your HVAC system, potentially saving you money on energy bills. When Should I Change My Air Filter? The frequency of air filter changes depends on several factors, including the type of filter you use, the number of residents and pets in your home, and the level of air pollution in your area. As a general rule, however, it’s recommended to change your air filter every 1-3 months. For homes with pets or allergy sufferers, it’s best to change the air filter more frequently. On the other hand, if you live alone in a low-pollution area, you may be able to get away with changing your filter less often. Check your filter monthly and replace it when it appears dirty. Changing your air filter regularly will help ensure that you’re breathing clean air and extending the lifespan of your HVAC system. Benefits of Regular Air Filter Changes Regularly changing your air filter comes with numerous benefits that extend beyond improving the lifespan of your HVAC system. Clean air filters can significantly impact the quality of the air you breathe and help keep your indoor air fresh and healthy. Some benefits of regular air filter changes include: Improved indoor air quality: Dirty air filters can trap pollutants and contaminants in your home, making it difficult to breathe. Regular air filter changes can improve air quality by removing these harmful particles from the air. Reduced energy costs: Air filters that are clogged with dust and debris can make it more difficult for your HVAC system to operate efficiently, which can lead to higher energy costs. By regularly changing your air filter, you can help your HVAC system perform at its best, saving you money on energy costs in the long run. Extended lifespan of your HVAC system: Dirty air filters can cause your HVAC system to work harder than necessary to circulate air throughout your home. This can put additional strain on your system and shorten its lifespan. By changing your air filter regularly, you can help extend the lifespan of your HVAC system. Don’t wait until your air filter is visibly dirty or your HVAC system is struggling to operate to replace your air filter. Regular maintenance tasks, such as changing your air filter, can be easy and affordable ways to improve the air quality in your home while extending the lifespan of your system. Air Filter Replacement Guide Replacing your air filter is an essential maintenance task that helps to ensure optimal indoor air quality. A dirty air filter can cause your HVAC system to work harder, resulting in higher energy bills and more frequent repairs. Here is a comprehensive guide to help you replace your air filter: Step 1: Determine the Type of Air Filter You Need There are various types of air filters available, including fiberglass, pleated, washable, and electrostatic filters. Consult your HVAC system manual or an HVAC professional to determine the correct type and size of filter you need. Step 2: Turn Off Your HVAC System Before replacing your air filter, make sure to turn off your HVAC system to avoid any potential injuries or damages. Step 3: Remove the Old Air Filter Locate the air filter in your HVAC system and remove it carefully. If it’s a reusable filter, be sure to clean it thoroughly. Step 4: Install the New Air Filter Insert the new air filter according to the manufacturer’s instructions and ensure it fits snugly in place. Double-check to make sure that there are no gaps between the filter and the frame. Step 5: Turn On Your HVAC System Once you’ve installed the new air filter, turn on your HVAC system and check for proper airflow. Also, make sure to mark the installation date on the filter to keep track of the replacement schedule. Following these steps can help you maintain optimal indoor air quality and prolong the life of your air filter. Tip: Regular air filter maintenance is essential for the health of your HVAC system and your family. Refer to the ideal schedule for air filter replacements in section 5 and the tips for extending the lifespan of your air filter in section 7 to help maximize the efficiency of your filter. Ideal Schedule for Air Filter Replacements Regular air filter changes help
Read More